


Your agent only knows what you paste into it. screenpipe keeps a searchable, local history of your screen text, app activity and transcribed calls. Its MCP server gives relevant excerpts to Claude, Codex and Cursor when you ask. It needs operating-system permissions, enough storage and a privacy check first.
As of 30/09/2026, founder/CEO Louis Beaumont's company was in Y Combinator S26 (YC also backed Airbnb and Dropbox); the repository had 21,781 stars. screenpipe reads the OS accessibility tree, falls back to OCR, records app switches and system/microphone audio, and lets you search by app, window, URL or date. It transcribes Zoom, Meet and Teams without a meeting bot.
Install screenpipe
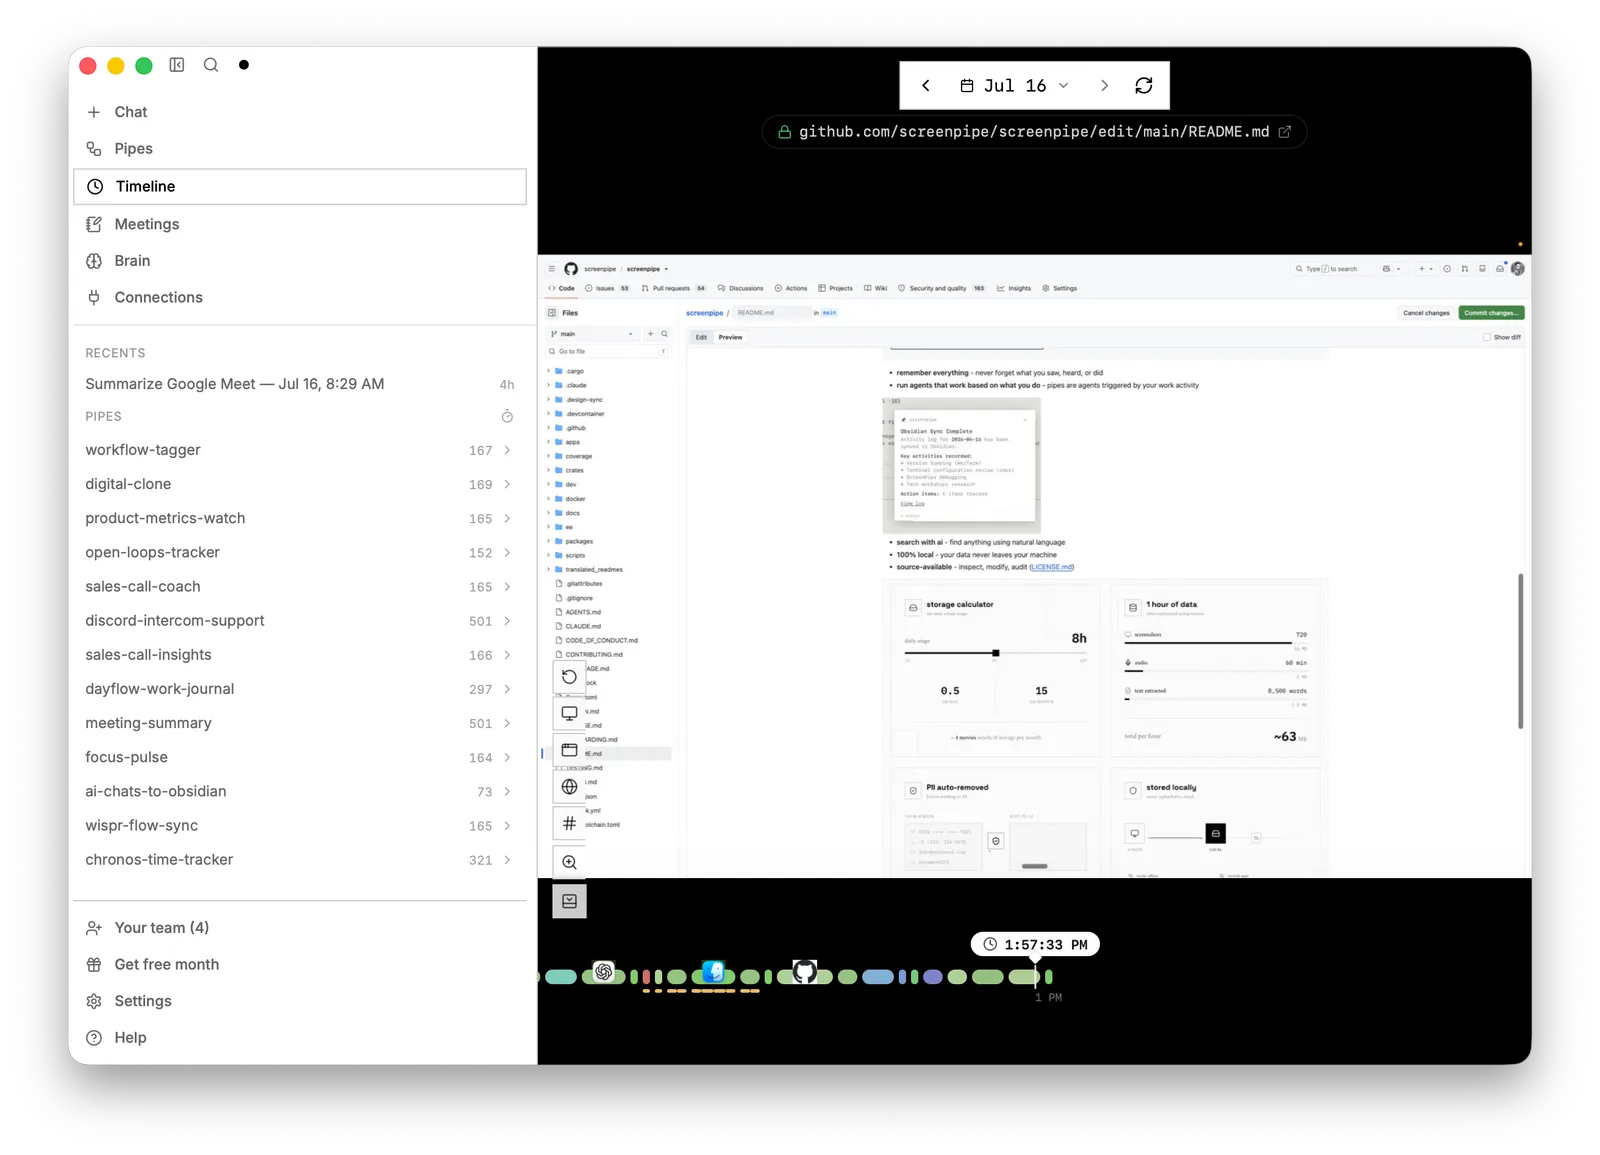
Ready-made app: Download at screenpipe.com. On 30/09/2026 the Free tier covered one device and limited searchable history; Basic was US$25/month or US$250/year for full history; Business US$50/seat/month; Enterprise custom. Check current prices. The app includes Timeline, Meetings and settings.
Free headless CLI for permitted personal use: Install Node.js 18+ and run:
npx -y screenpipe@latest recordLeave the terminal running. This records locally and exposes the API on http://localhost:3030, without the app UI. Check privacy before recording a shared machine.
Build the app from source: Follow the current CONTRIBUTING.md. On macOS install rustup, Homebrew, Bun and full Xcode, then:
brew install pkg-config ffmpeg jq cmake wget git-lfsgit clone https://github.com/screenpipe/screenpipe.git && cd screenpipecargo build --release --features metalcd apps/screenpipe-app-tauri && bun install && bun run build:tauri:devThis is a development build, not a packaged installer. Windows needs VS Build Tools, Rustup, LLVM, CMake, Git, 7zip and Bun via winget; Linux users should follow the source-build instructions. Commercial use of source-built code requires a paid licence.
Set permissions and privacy
On macOS open System Settings → Privacy & Security and grant screenpipe Screen & System Audio Recording, Microphone and Accessibility; restart the app if prompted. In Settings → Recording, select local Whisper instead of cloud transcription. In Settings → AI, select a local Ollama model instead of screenpipe-cloud, with Ollama installed and running. The project's own screenshots show cloud options selected; do not assume offline operation out of the box.
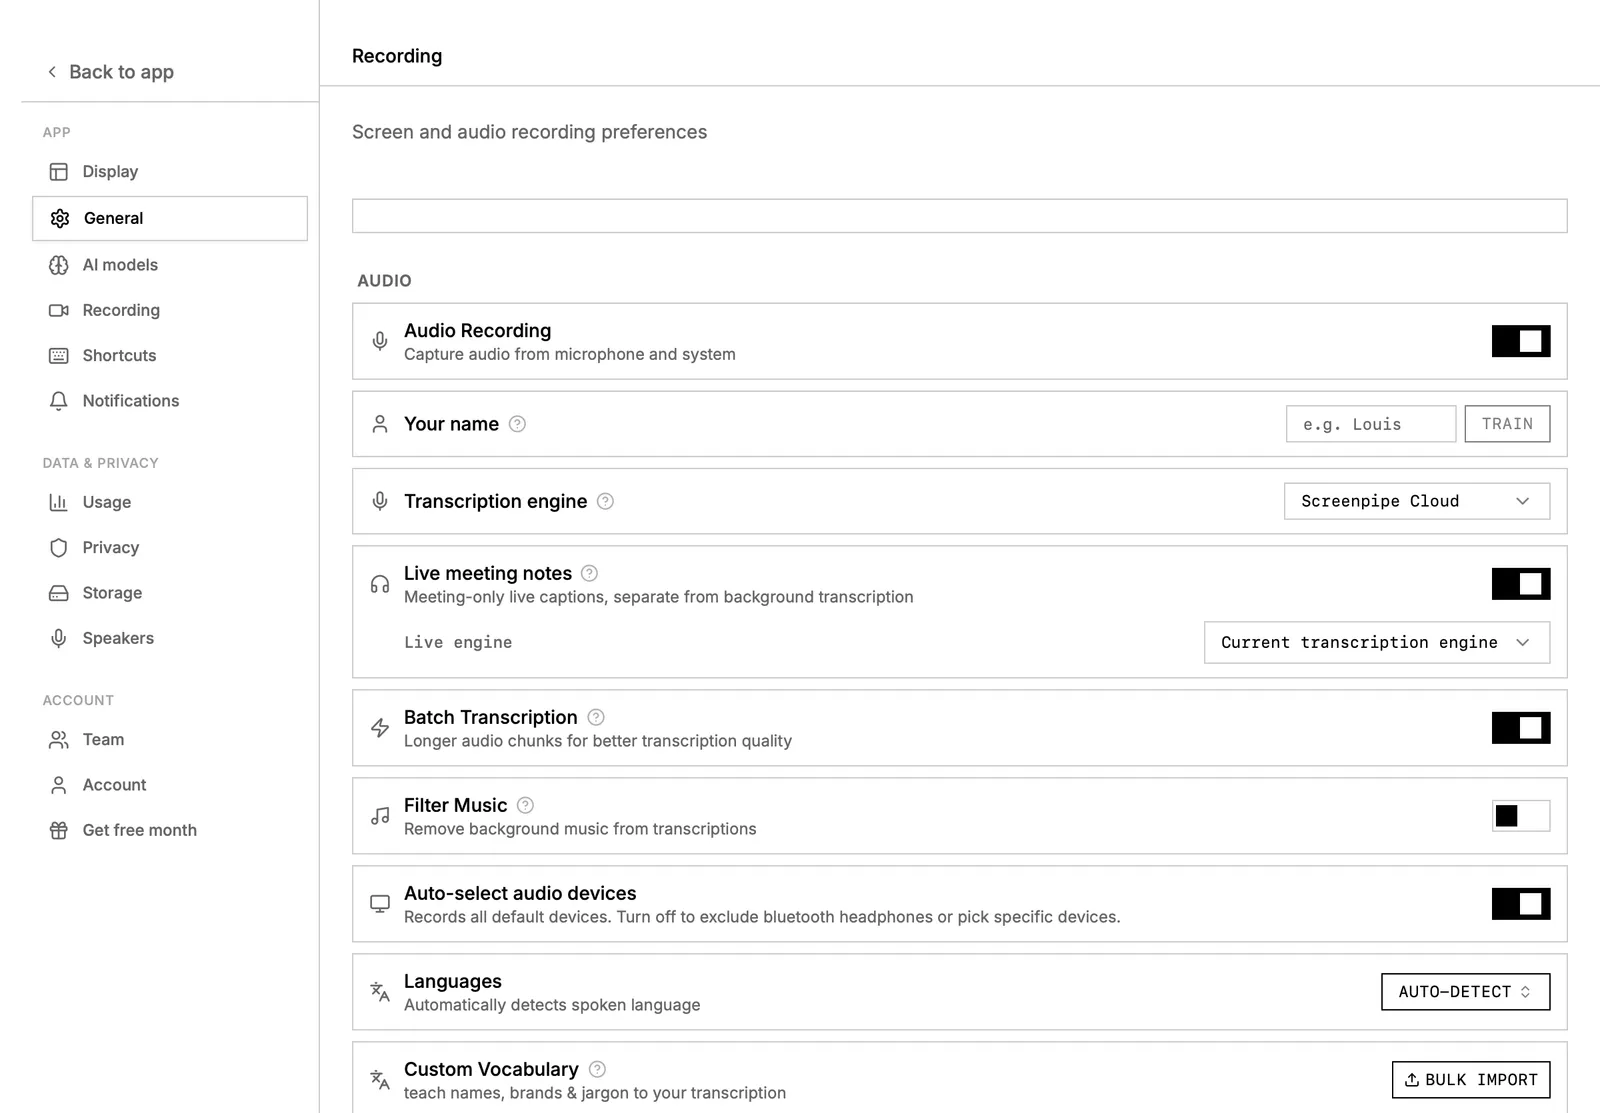
Recordings, transcripts and index stay on your device by default, with optional encryption at rest. PostHog analytics and Sentry crash reports are on by default; turn them off at Settings → Privacy → Analytics. Cloud transcription, screenpipe cloud AI and sync transfer data when chosen. Sending retrieved excerpts through MCP to Claude or Codex sends them to Anthropic or OpenAI; Cursor may also use a cloud model. For fully local work, use local capture, Whisper and Ollama in screenpipe without external AI clients. See data flow and the FAQ.
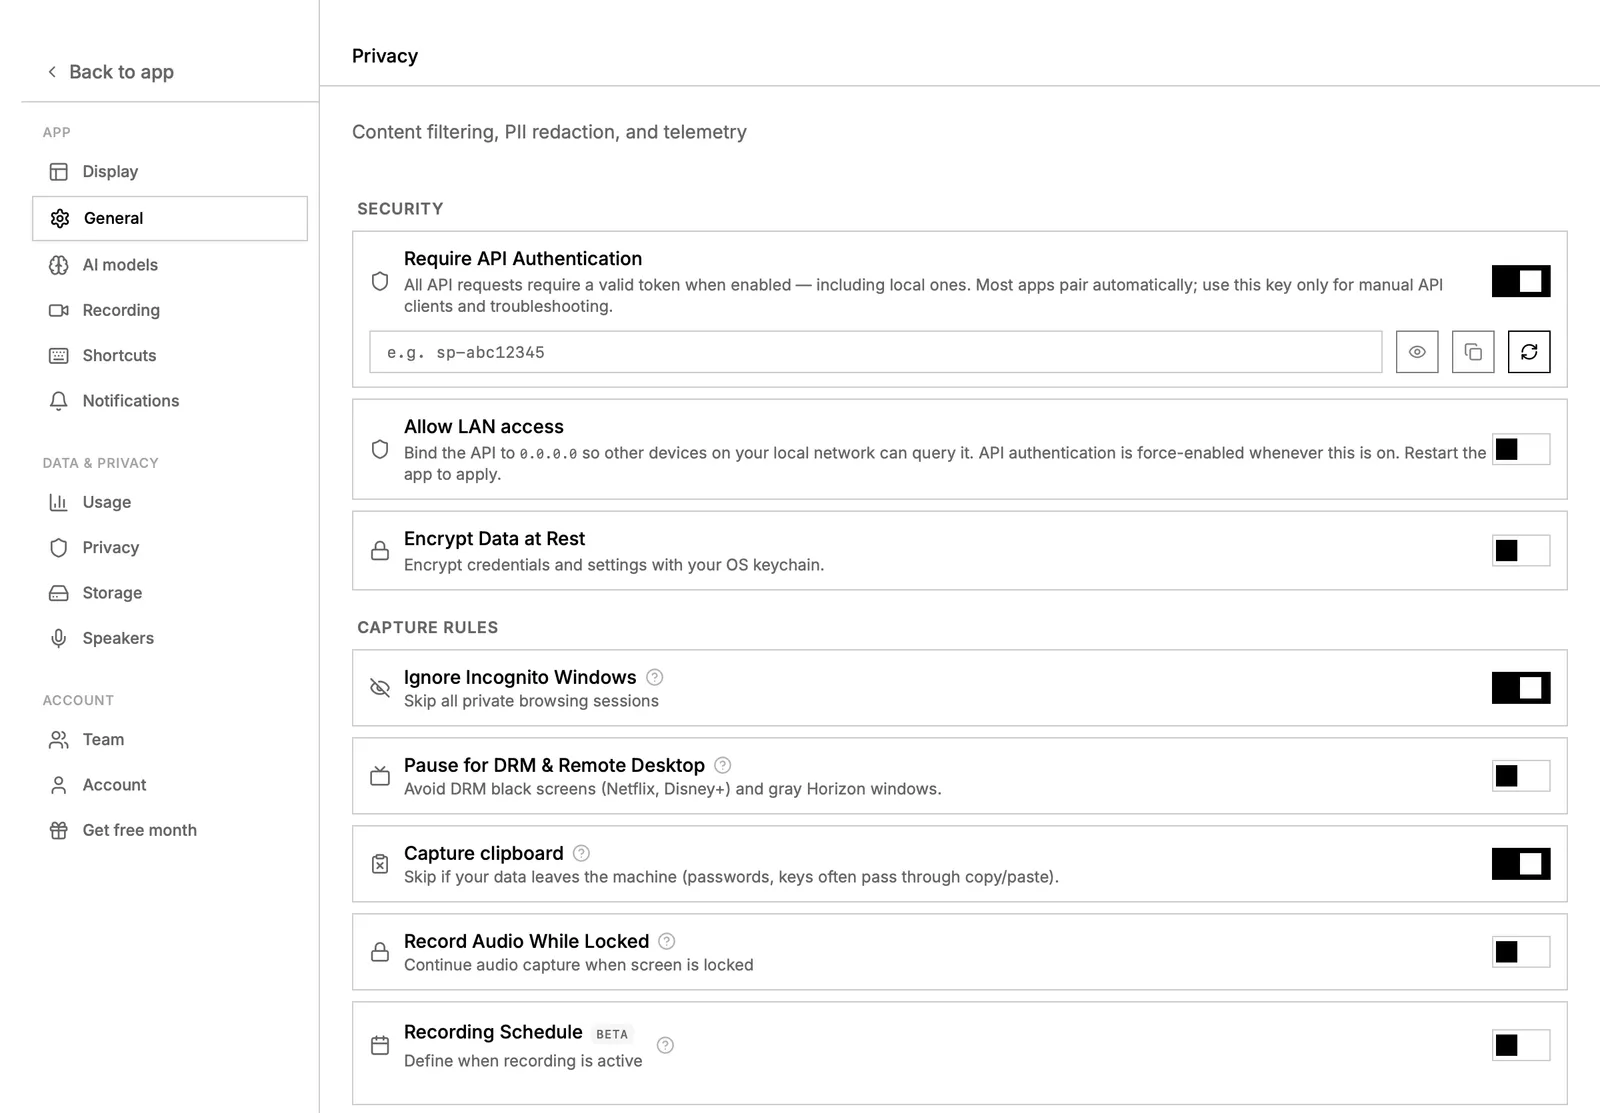
Password fields are skipped by default (skip_password_fields); form values such as passwords, cards and secrets are redacted on-device by default. 1Password, Bitwarden, LastPass and Dashlane are excluded. The filter docs warn redaction can miss information. Add banking and sensitive apps to ignored windows; inspect what was captured before sharing.
Connect Claude Code
Keep screenpipe running at localhost:3030; Node 18+ is needed. Run:
claude mcp add screenpipe --transport stdio --scope user -- npx -y screenpipe-mcpOpen Claude Code and type /mcp to check the server. Approve search tools when asked. Restart Claude Code and check the local service if disconnected.
Connect Claude Desktop
Go to Settings → Connections and install the screenpipe extension. Alternatively, merge this server into claude_desktop_config.json, save and restart Desktop. Preserve existing servers:
{"mcpServers":{"screenpipe":{"command":"npx","args":["-y","screenpipe-mcp"],"transport":"stdio"}}}
Check that screenpipe's tools appear in chat.
Connect Codex
In the Codex app use Settings → Connections → Connect (writes ~/.codex/config.toml). Or append to that file without removing other servers:
[mcp_servers.screenpipe]
command = "npx"
args = ["-y", "screenpipe-mcp"]
enabled = true
Restart Codex and confirm the connection. Retrieved excerpts reach OpenAI if your Codex model runs in its cloud.
Connect Cursor and ask a question
Use the Cursor deep link in the MCP guide, or Cursor Settings → MCP → Add global server, command npx, arguments -y and screenpipe-mcp. For project-scoped setup, merge into .cursor/mcp.json:
{"mcpServers":{"screenpipe":{"command":"npx","args":["-y","screenpipe-mcp"]}}}
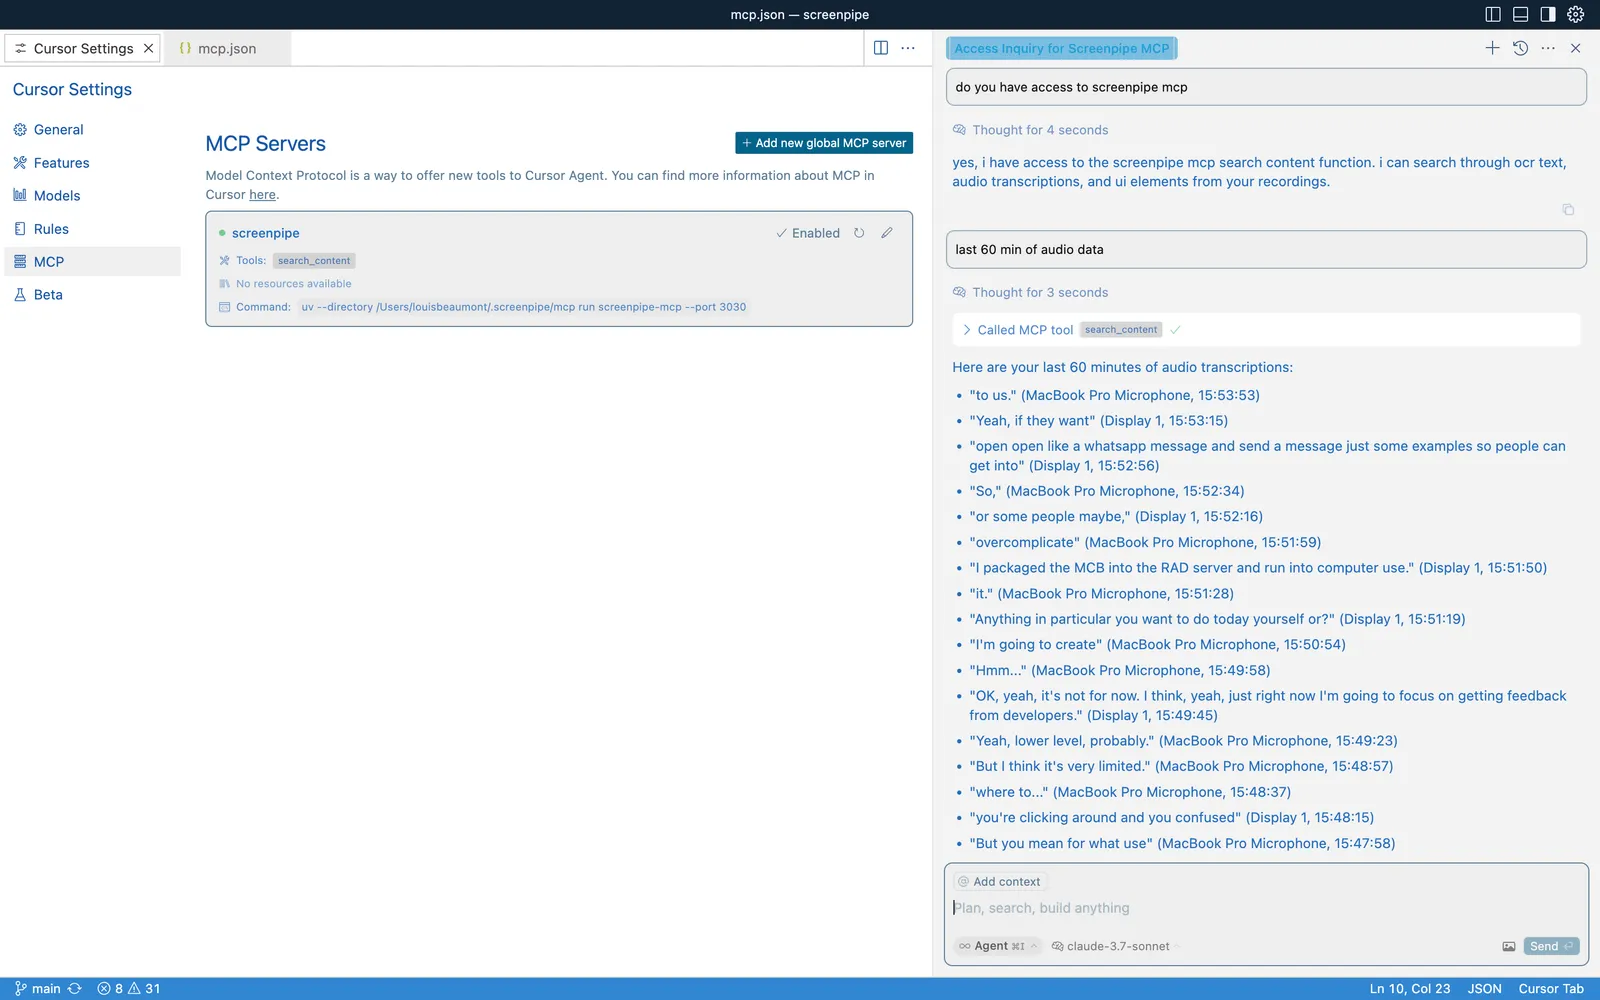
Shortcut: npx screenpipe setup installs skills and MCP for supported agents it detects. Prefer manual setup if you want to restrict access. Ask “what did I see on screen in the last 5 minutes?”, “summarize today's conversations” or “what price did the client quote on yesterday's call?” The price question is illustrative: it requires a recorded, legible transcript. Verify answers in the timeline.
Meetings, storage and licence
The Summarize button works on demand. When enabled, the bundled meeting-summary pipe responds to meeting_ended and writes a summary into the meeting note. Its default preset is screenpipe-cloud, with paid-plan AI allowance; automatic summaries are not guaranteed unless configured. Under Pipes → meeting-summary, choose your own local Ollama model where available, enable it and test a meeting. See meeting intelligence.
As of 30/09/2026 the vendor README claimed 5–10% CPU, 0.5–3 GB RAM and ~20 GB/month storage. Its pricing page instead listed 10–30% CPU on Apple M3, 600 MB–4 GB RAM and ~30 GB/month. These are not independent benchmarks. Set retention and delete old data under Settings → Storage.
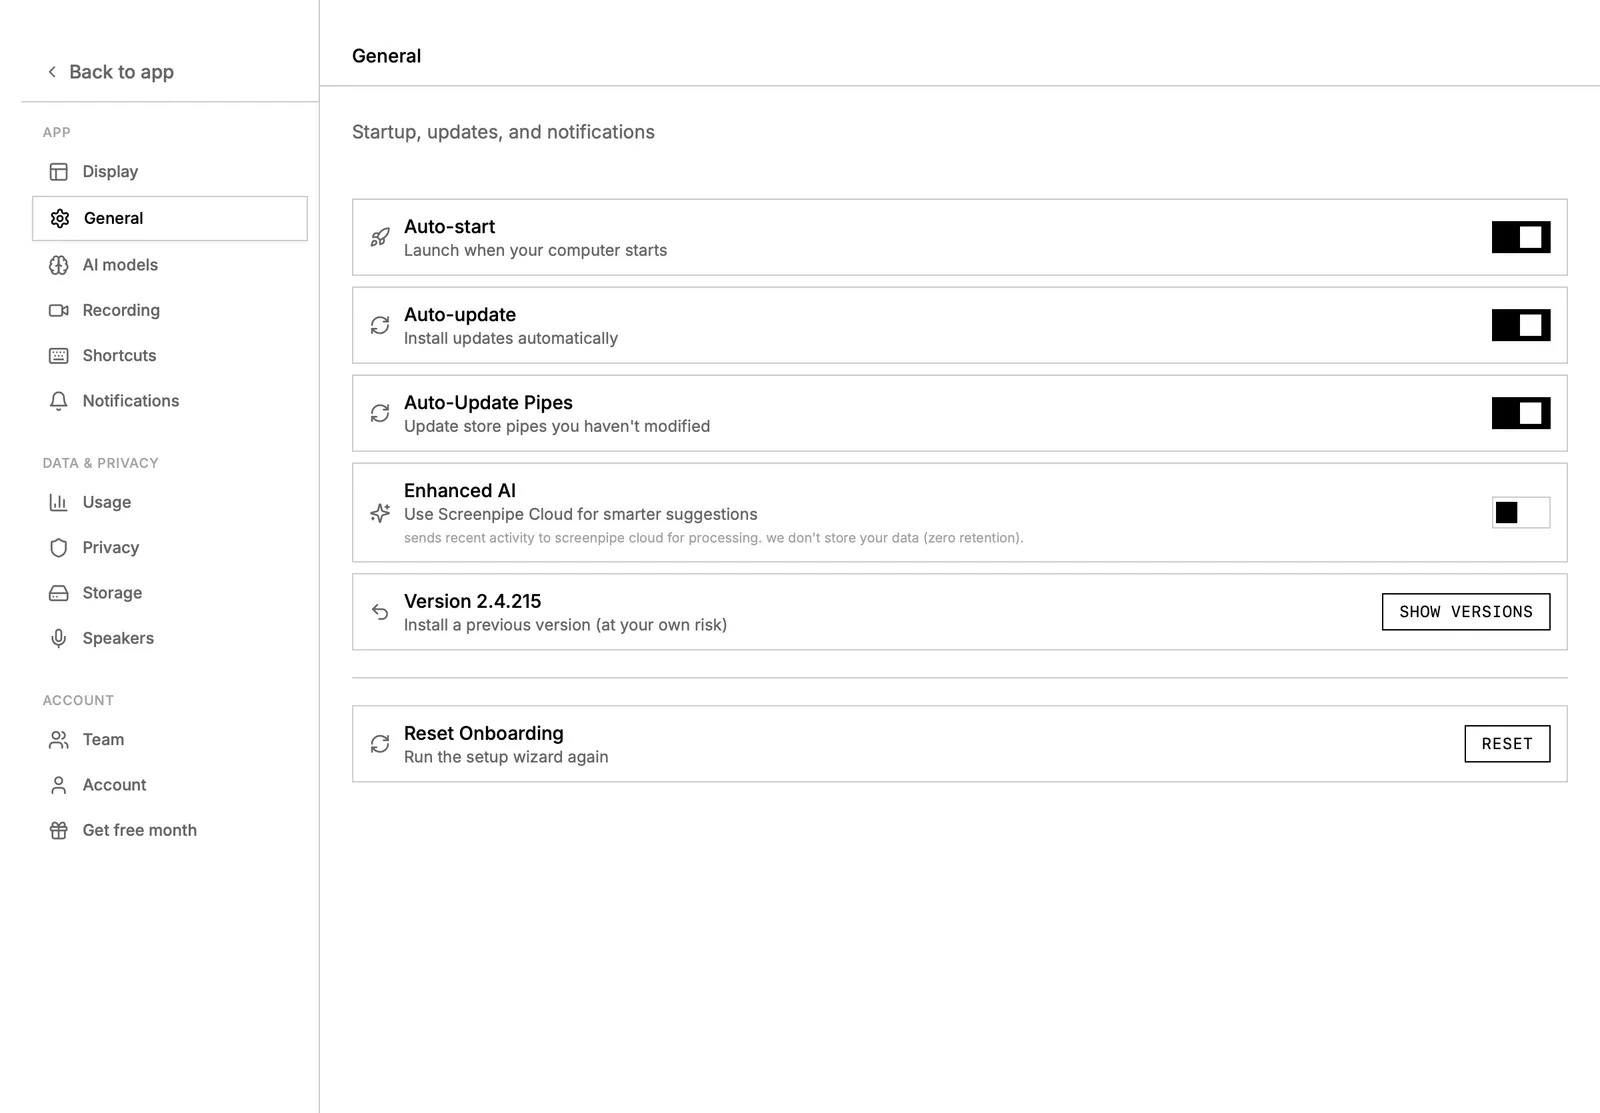
Since 10/06/2026 current source is source-available, not open source, under the Screenpipe Commercial License. Personal non-commercial, nonprofit, education and research use are free; companies get seven days to evaluate, then need a paid licence. Older MIT versions retain their old licence. The getting-started page still says MIT and is stale. Official binaries have separate subscription terms.
FAQ
Is it free? The ready-made Free plan has limited history; CLI/source use is free only where the licence permits. Basic was US$25/month on 30/09/2026.
Does my screen go to the cloud? Storage is local by default, but telemetry is enabled; cloud options and context shared with remote AI clients leave your machine.
Does it record passwords? Password fields are skipped and form values redacted by default, but filtering may miss information. Exclude sensitive apps.
Will it slow down my Mac? It depends. Check actual performance on your machine rather than trusting the vendor's differing estimates.
Does it work on Windows/Linux? Yes, with different permissions and installation steps. For Linux builds consult CONTRIBUTING.md.
Can I use it at work? Source-built commercial use needs a paid licence; also check your workplace's recording and consent policies.
How do I delete history? Use Settings → Storage to remove old data and set retention. Uninstalling the app alone may leave data files.
Comments
Have a question or something to add? Join the conversation.
No account needed. Select Sign in and choose a name to comment.
Loading the conversation…
Comment privacyCommenting guidelines